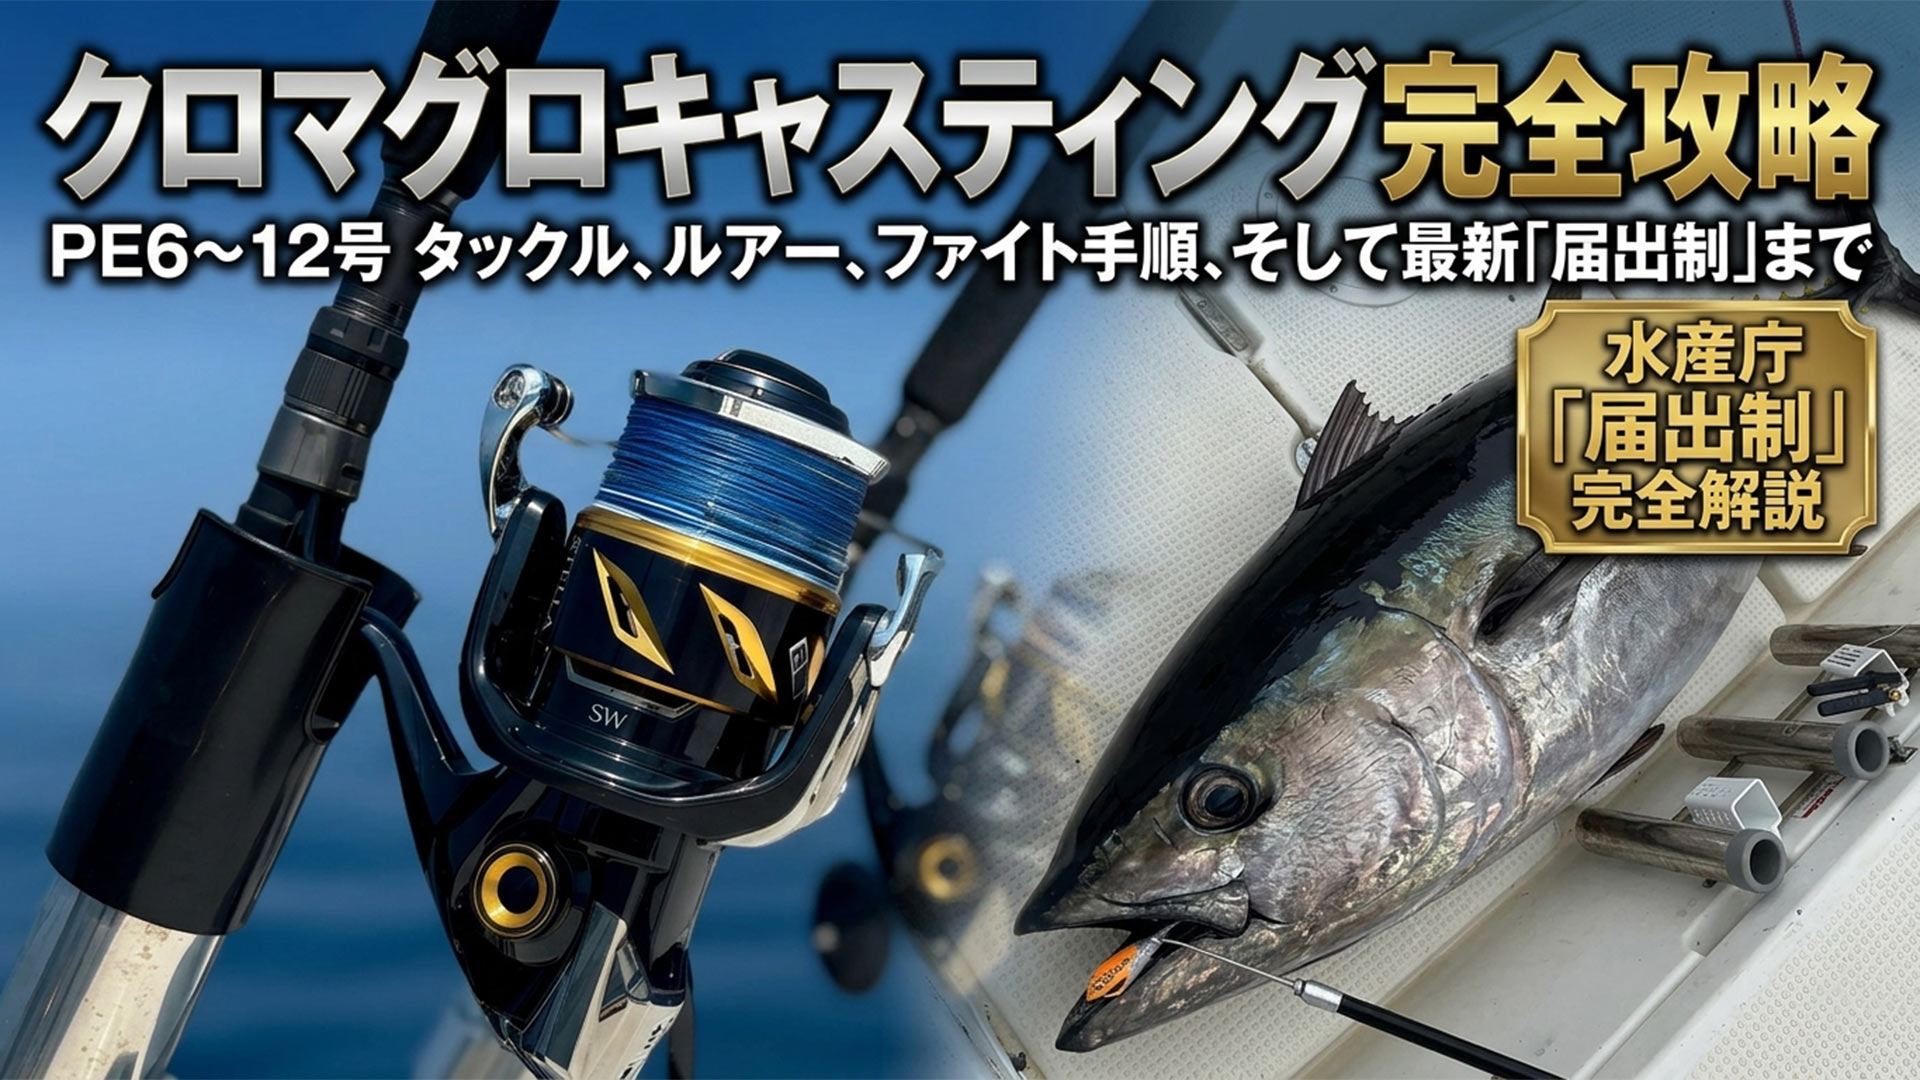
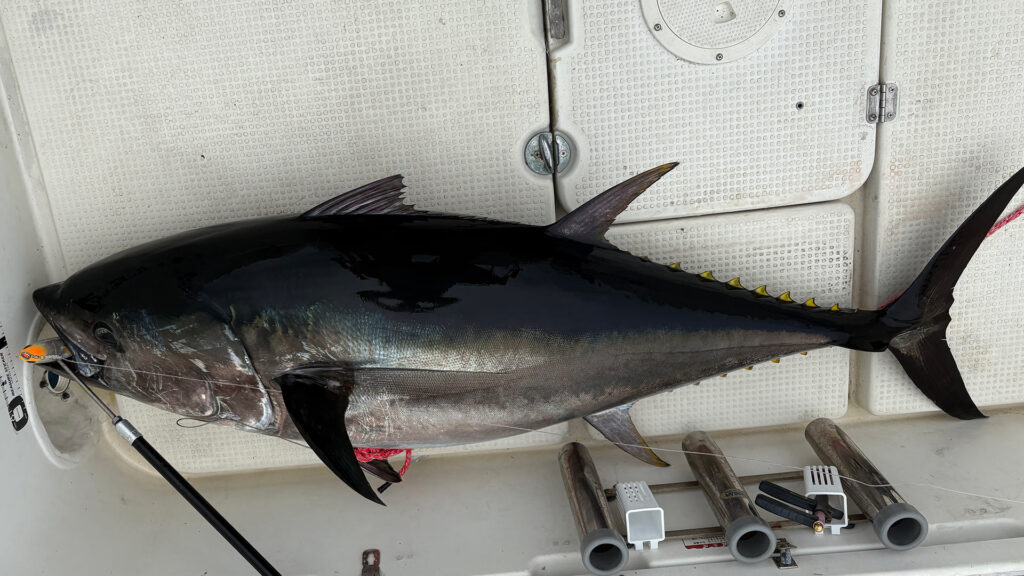
Bluefin tuna casting is the absolute pinnacle of lure fishing. Anglers use heavy tackle (PE #6–#12) to cast large poppers and diving pencils, aiming to entice monster bluefin tuna weighing over 50–100kg right at the surface.
To encounter that one fish that could change your life, anglers invest an enormous amount of time and money, spending countless days out on the ocean. In this article, I, a local angler based in Shakotan, Hokkaido, will share everything I know about this ultimate game—from choosing the right tackle and selecting lures based on feeding patterns, to sure-fire fighting procedures, seasonal info, and the latest guide to the “Mandatory Registration System” enacted in April 2026.
- 1. What is Bluefin Tuna Casting? The Crucial Difference from Yellowfin Tuna
- 2. PE #6, 8, 10, or 12? The Basic Setup for Bluefin Tackle
- 3. Poppers or Pencils? How to Choose Lures Based on Situations
- 4. What Pound Leader and Knot? Building a Reliable Line System
- 5. Drag Settings and Fighting Procedures from Hookset to Landing
- 6. When and Where to Catch Them? Areas, Seasons, and Charter Costs
- 7. What Changed in April 2026? Registration Procedures and Catch Limits
- Conclusion | Prep Starts a Year Ahead: First Step Checklist
1. What is Bluefin Tuna Casting? The Crucial Difference from Yellowfin Tuna
[Answer]
Bluefin tuna casting is the ultimate topwater game targeting massive fish over 50–200kg using heavy dedicated tackle (PE #6–12). The biggest differences from Yellowfin tuna (PE #4–6) are the “overwhelming tackle strength required” and the “lengthy preparation period,” which often takes 6 months to a year just to gather the proper gear.
Bluefin tuna casting involves casting large topwater plugs or sinking pencils from a charter boat to snipe bluefin tuna feeding near the surface.
It is no exaggeration to say that compared to yellowfin tuna casting (PE #4–6, targeting up to 50kg), the tackle strength, fight time, and preparation period make it a “completely different sport.”
- For Yellowfin Tuna: Rods rated for PE #4–6, reels in the 8000–14000 size range, and drag settings of 6–10kg are sufficient. Fights usually settle within 10–40 minutes, and the initial cost for a tackle setup stays around 150,000 to 300,000 JPY.
- For Bluefin Tuna: There is always a chance a fish over 100kg will strike. You need dedicated rods rated for PE #6–12, massive 14000–30000 size reels, and initial drag settings of 8–12kg that must be tightened to 15–20kg during the fight. Fights can last anywhere from 30 minutes to over 2 hours. The initial cost for a two-tackle system is roughly 500,000 to 800,000 JPY.
The biggest difference is the “preparation period.” Large-capacity reels and bluefin-rated rods are constantly out of stock. (I assume initial production runs are extremely limited—maybe only 200 rods nationwide).
If you miss the initial batch, you often have to wait 6 months to a year for the next production. While proven lures and heavy PE lines are relatively easy to find, the essential rods and reels fly off the shelves and vanish completely right before the season starts. “If you want to fight a bluefin this summer, you needed to start preparing last year.” This is the harsh reality of this game.
2. PE #6, 8, 10, or 12? The Basic Setup for Bluefin Tackle
[Answer]
Choose your PE line class from 4 levels based on the target size. Use PE #6–8 for casting distance and 50–80kg class fish, PE #10 for 80–130kg class, and PE #12 for monsters over 100kg. If your budget allows, a two-tackle system of “PE #8 + #10” with a PE #12 setup hidden as a backup is the best strategy.
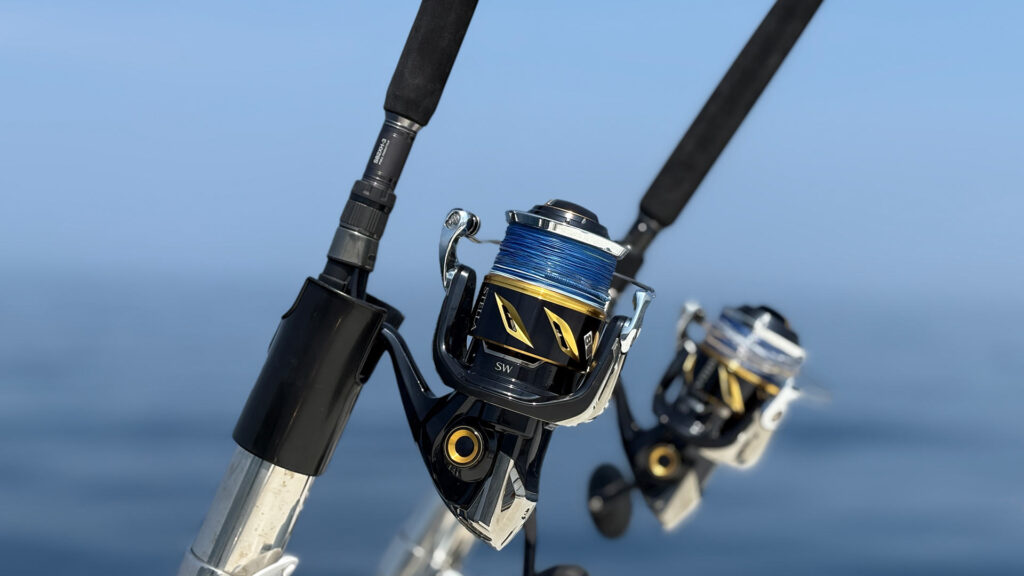
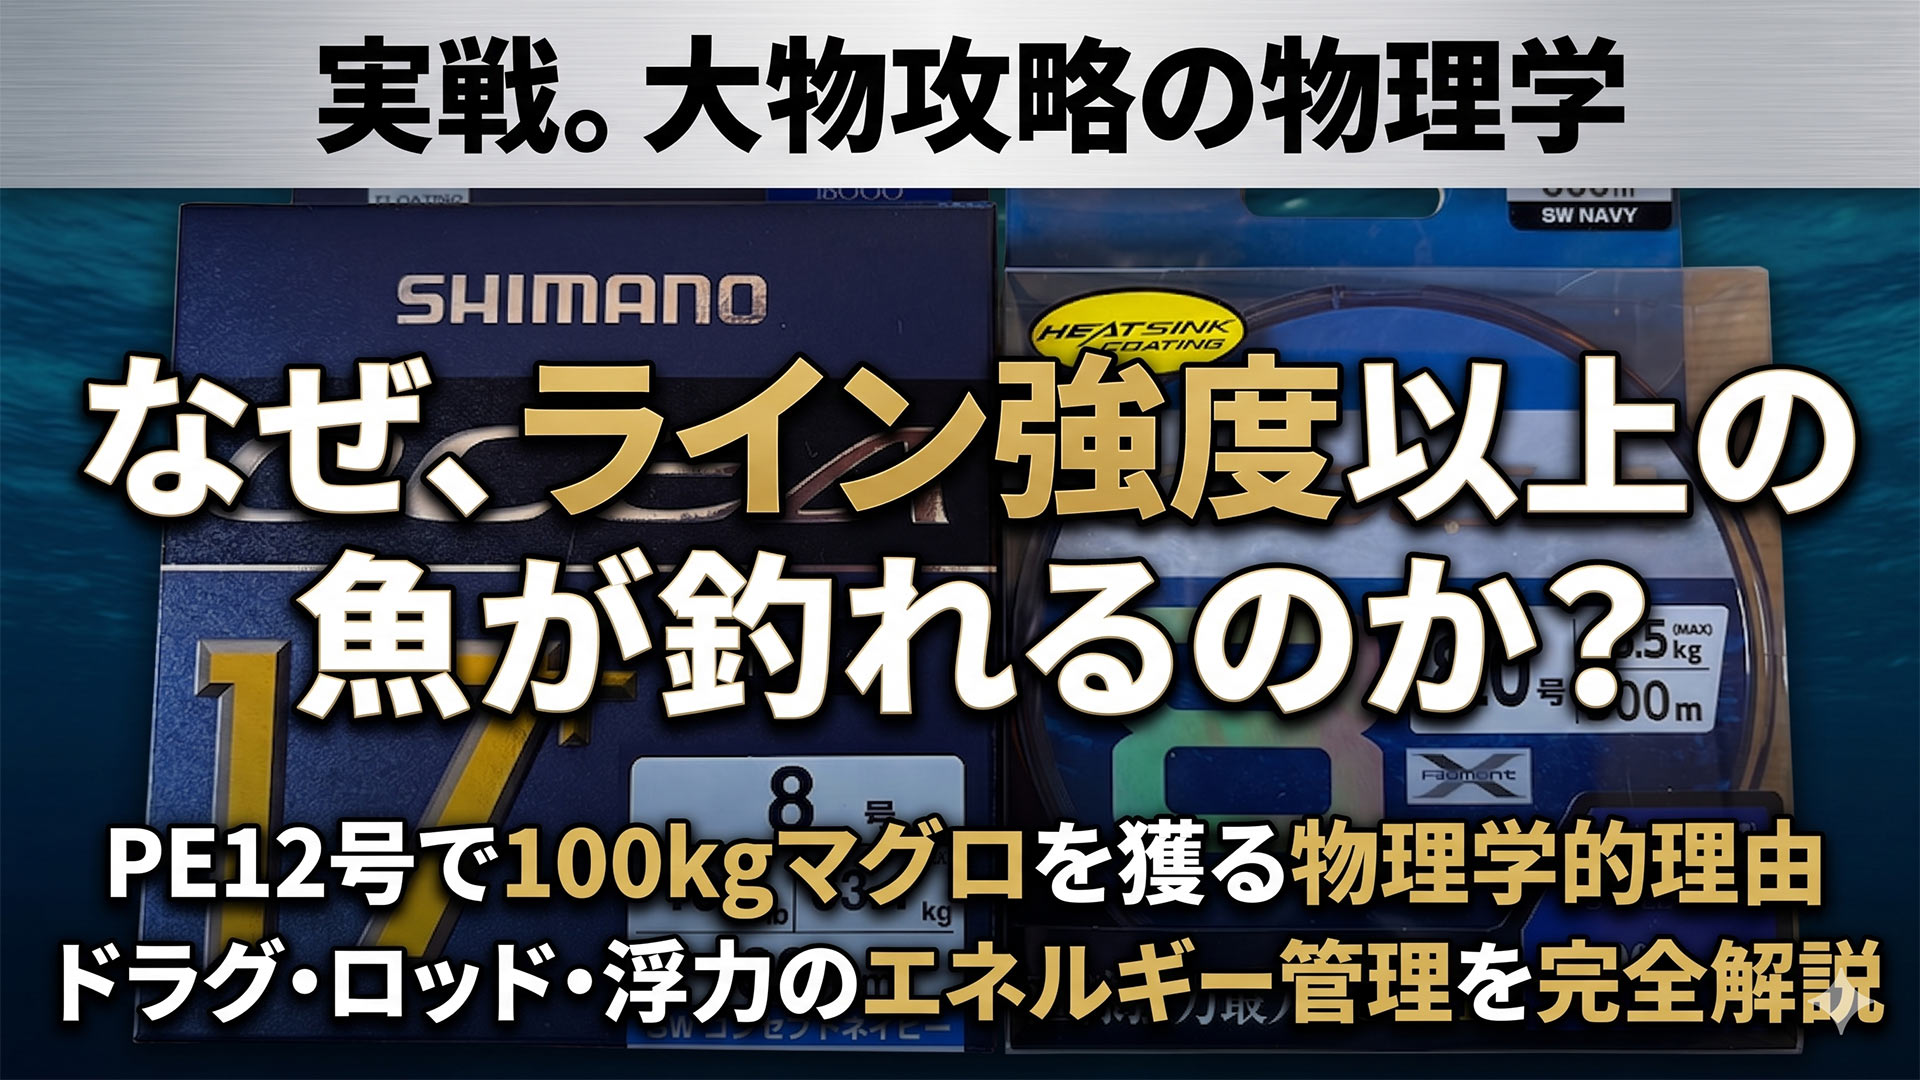
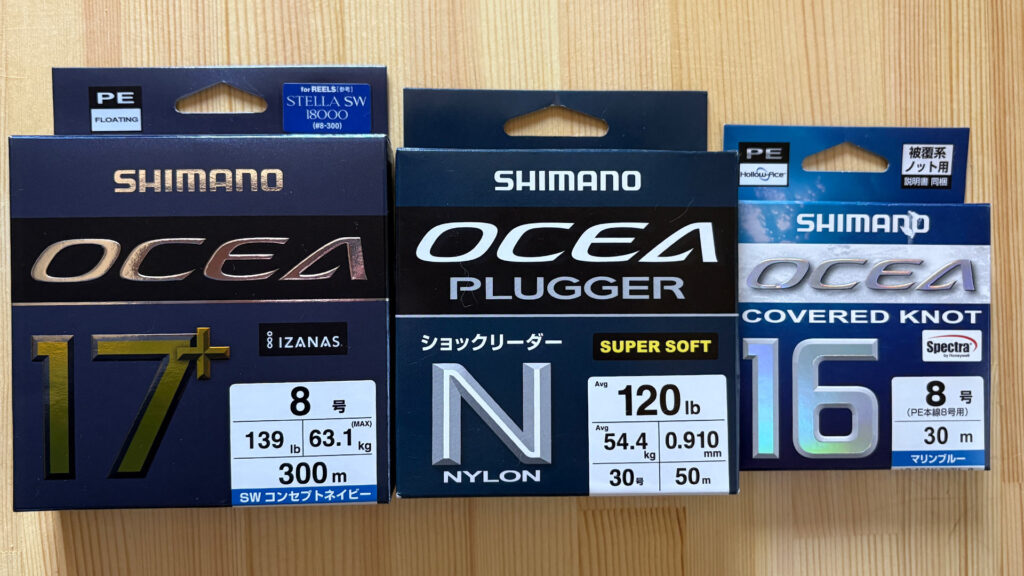
The core bluefin tackle is built around 4 line classes (PE #6, 8, 10, 12). The basic mindset is to choose the PE rating based on the max target size and ocean currents, then match the rod, reel, and leader accordingly.
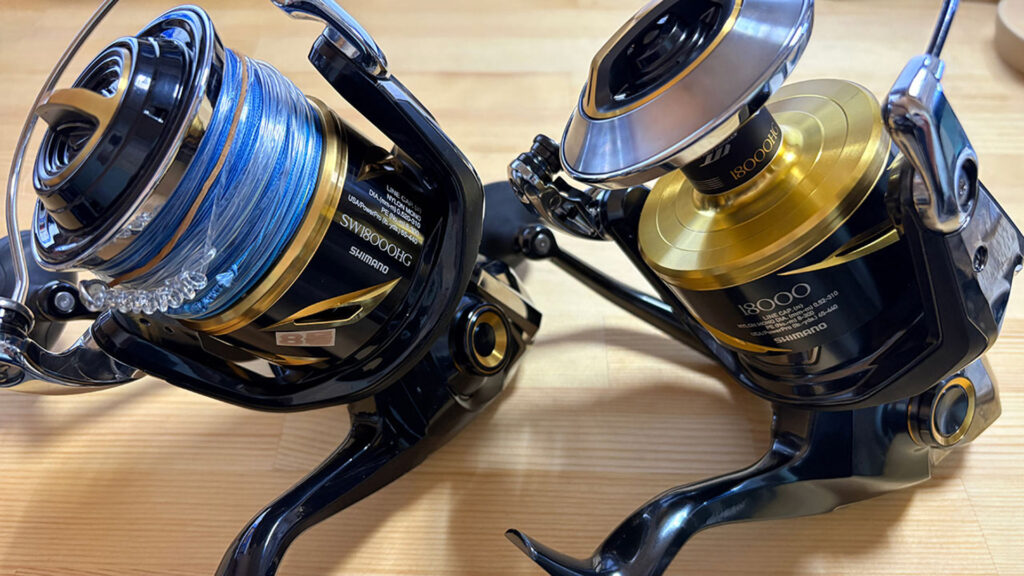
- PE #6–8 Setup (Mainly 30–80kg / Distance Focused): Reel size 14000–18000. Rod: 8–8.5ft XH class. Leader: 100–150lb nylon.
I relatively use this light setup in Shakotan. While there are 100kg+ monsters here, early summer (August) sees smaller fish, often in the protected (no-keep) size range forming boils. It sizes up in autumn. Previously, #6–8 was enough, but due to recent sizing-up trends, going one rank heavier is safer. (Setup Example: Ocea Plugger Full Throttle S82XH-3 + 25 Stella SW 14000XG/18000HG + Ocea 8 PE #6-8 300m) - PE #10 Setup (Mainly 80–130kg / The Middle Ground): Reel size 18000 or 20000. Rod: 7.5–8ft. Leader: 170–190lb nylon. Casting distance drops compared to #8, but the sense of security during a fight increases dramatically. However, it reaches its absolute limit against 150kg+ fish. There are cases where fighting a 150kg tuna on PE #10 caused the line to visibly crush and stretch thin like PE #8, rendering it useless. (Setup Example: MONSTER DRIVE S83XH-3 + 26 Stella SW 18000HG/20000PG + Ocea 17 PE #10-12 300m)
- PE #12 Setup (For 100–200kg+ Monsters): Reel size 20000–30000. Rod: 7–7.5ft short power model (prioritizing lifting power over distance). Leader: 220–300lb nylon. This is the main weapon during peak seasons from Tappi to Oma where triple-digit (100kg+) fish frequently appear. Adding a fighting leader (Zylon) is effective for Mahi-Mahi patterns, but in my opinion, it reduces bites during sardine patterns or blind casting. (Setup Example: BLUEFIN TUNA S70XXXH + 26 Stella SW 25000PG/30000PG + Ocea 17 PE #12 300m)
Recommended 2-Tackle Strategy: The future standard will be the “PE #8 + PE #10” combo. Generally, you use PE #8 to cover water efficiently (blind casting), and switch to PE #10 when giant sizes are confirmed. If your budget allows, keeping a PE #12 setup ready gives ultimate peace of mind.
[Bonus] The 26 Stella SW 18000HG allows great spool versatility. The 18000, 20000, and 25000 models share spool compatibility.
A highly recommended, versatile, and tough rod. If you plan on traveling, consider the 3-piece MONSTER DRIVE S83XH-3.
3. Poppers or Pencils? How to Choose Lures Based on Situations
[Answer]
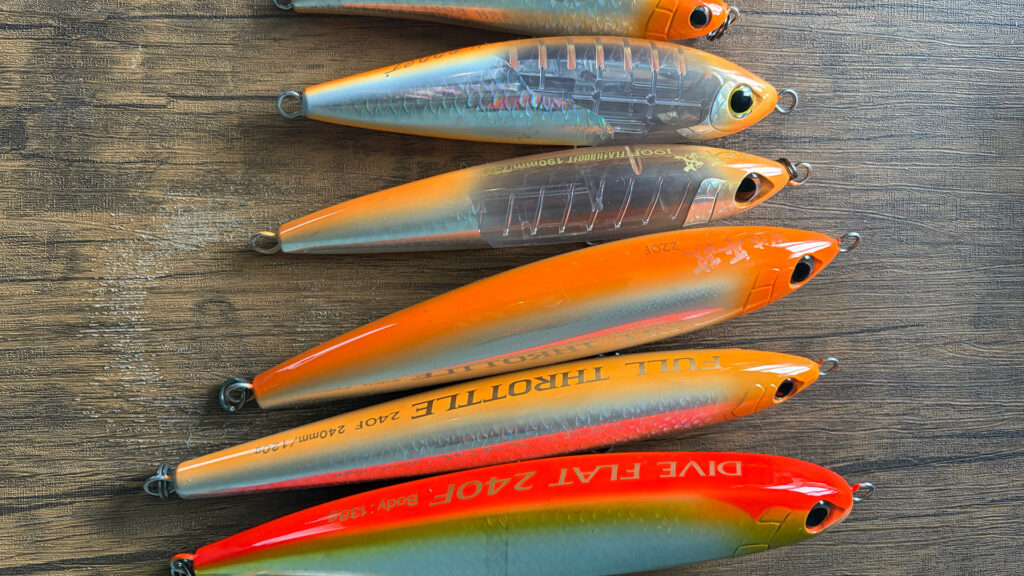
Lure selection relies on 3 feeding patterns. Use poppers to draw fish up during “Blind Casting” (when no fish are visible). Use floating pencils and leave them motionless (Dead Sticking) during “Sardine Boils.” And use massive 200mm+ diving pencils for the monster-producing “Mahi-Mahi pattern.”
Lures used in bluefin casting generally fall into 3 categories: Poppers (surface), Diving Pencils (surface to sub-surface), and Sinking Pencils. Your choice depends entirely on the tuna’s feeding pattern that day.
Pattern 1: Blind Casting (When fish are not visible)
When you can’t see tuna or boils, you use the sound and bubbles of the lure to draw fish to the surface. The main weapon here is a popper (180–240mm / 60–120g). While many say you should keep it moving constantly, I personally emphasize “adding a solid pause (stay).” Creating dense bubbles with continuous popping, followed by a pause to let them strike, is my style. Slim poppers that produce fine, high-density bubbles are the current trend; Shimano’s “Bomb Throttle 200F Flash Boost” creates excellent bubbles.
Pattern 2: Casting into Sardine Boils (Feeding Frenzy)
When tuna are chasing sardines and the surface is boiling, your approach fundamentally changes. The basic rule is “Dead Sticking (leaving it motionless)” after it lands. Overworking the lure is strictly prohibited. Anticipate the direction of the boil, cast slightly ahead, and just wait. If they don’t bite, give it one twitch and pause again. Floating diving pencils (180–240mm) are standard, but if the bait is tiny anchovies, dropping the lure size to a 9–12cm sinking pencil can suddenly trigger non-stop bites. Tuna observe lures surprisingly calmly. However, I personally keep throwing max-size 240mm lures because I believe in “Big Bait, Big Fish.”
Pattern 3: Dorado / Mahi-Mahi Pattern (Max Monster Probability)
I’m writing about this, but honestly, I haven’t experienced it yet (laughs). When Dorado (Mahi-Mahi) are the main bait, it yields the highest probability of encountering 200kg class monsters. Dorado flee by jumping across the surface, and right as they land, massive tuna violently thrust up from below. I definitely want to challenge this realm in the future. A heavy PE #12 setup and a fighting leader (Zylon) are absolutely necessary here.
4. What Pound Leader and Knot? Building a Reliable Line System
[Answer]
Match your nylon leader to the PE strength: 120–150lb for PE #8, and 220–270lb for PE #12. The current standard is to wind the leader 1 or 2 turns into the spool. A highly stable PR knot is recommended. Never use snaps; connect lures using ball-bearing swivels and split rings rated for over twice your main line’s strength.
The foundation of a line system is connecting a nylon shock leader matched to your PE class.
- PE #6 (113lb) + Nylon 100–120lb: Mainly for 20–50kg yellowfin or bluefin under 50kg. Historically the standard for Shakotan bluefin.
- PE #8 (151lb) + Nylon 120–150lb: For the future 50–80kg main targets in Shakotan. The best balance of distance and strength; the core setup for blind casting and boils.
- PE #10 (169lb) + Nylon 170–190lb: A reassuring heavy setup for 80–130kg class. Minimizes line damage accumulation during long fights, allowing aggressive pressure.
- PE #12 (197lb) + Nylon 220–270lb: Exclusively for 100–200kg+ monsters. Prioritizes absolute strength and lifting power over casting distance.
The Universal Rule of Strength Design (Based on Shimano’s Real Specs)
In general fishing (like for seabass), it’s standard to intentionally create a “weak point” at the lure knot so it breaks cleanly if snagged. However, for tuna, “creating an intentional weak point in the system is absolutely unforgivable.” This is the universal design philosophy.
Shimano’s “Ocea 8 (PE #8)” has a straight tensile strength of 151lb (approx. 68kg). You might think “20kg of drag is easy for a 68kg line,” but line strength drops the moment you tie a knot, and friction heat during a fight degrades it further. In reality, 151lb is the “absolute bare minimum to withstand 20kg of drag.” That is exactly why pairing it with a nylon leader of equal or slightly higher strength is the golden ratio.
Leader Length: “Winding into the Spool” is the Current Meta
The current mainstream leader length is adjusted so that “the knot enters the spool, and the thick leader is wound around the spool for 1 to 2 turns” before casting. This prevents the terrifying risk of slicing your finger off when full-casting a 100g+ lure with thin PE, and protects the main line from abrasion against the tuna’s rigid body during a fight.
FG knots or PR knots are primarily used, but I highly recommend the “PR Knot” tied with a bobbin knotter for its supreme stability. *Regardless of the knot, always apply Vaseline/chapstick when tightening to prevent friction heat from fatally degrading your PE line.
Hardware Must Be “Double the Line Strength”
Using snaps to connect your lure is strictly forbidden. Always use a “Ball Bearing Swivel + Split Ring” combo. Tuna will rapidly swim in circles during a fight, making the rotational function of the swivel essential. The strength baseline is “more than double your main line,” but select an appropriate physical size so you don’t kill the lure’s action.
5. Drag Settings and Fighting Procedures from Hookset to Landing
[Answer]
Never jerk hard; apply a “sweep hookset” to load the fish’s weight. Trust your initial drag during the explosive first run. Start pumping only after it stops. When the fish gets within 50m, prepare for a violent “second run” by slightly loosening the drag. Finally, guide the fish to the gaff with a straight-rod, under-arm fight.
The basic mindset for initial drag is “matching the PE rating in kg (e.g., 8kg for PE #8),” adjusting based on your physical strength and experience. You adjust the drag higher as the tuna weakens.
Step 1 “The Hookset”: Don’t Panic
Do not set the hook violently the moment the tuna bites. First, reel in the slack to “feel” the fish. The pull differs whether the lure is swallowed or hooked in the corner of the mouth (the scissors). Large targets often don’t even realize they are hooked at first. Once the fish starts running, apply a Sweep Hookset—bending the rod smoothly backward to load the fish’s weight. You don’t need to strike again after this.
Step 2 “The First Run”: Trust Your Drag
Right after the hookset, the tuna will dash furiously. It’s not uncommon for 100m of line to scream off the spool instantly. Tightening the drag in a panic here will cause a line break. Let it run. Once the first run stops, apply one more sweep hookset for safety. Keep tension on the line, seat the rod into your gimbal belt, and enter your fighting position.
Step 3 “The Main Fight”: Conserving Stamina & Rod Angle
Bring the fish in by “pumping” (lifting the rod, then reeling as you lower it). Dropping the rod angle below 40 degrees will ironically drain your stamina faster. Keep the angle high and reel in even if it’s just half a crank. Don’t rush! Conserving energy early on is key. Do not pump with just your arms; keep your arms locked and use your back and entire body weight. This drastically reduces fatigue. Once the fight stabilizes, I personally loosen the drag slightly.
Step 4 “Preparing for the Second Run”: The Terrifying Final 30m
The real battle begins when the fish is 30m to 50m away. When the tuna spots the boat, there is a 99% chance of an explosive “Second Run.”
Your greatest preparation is the “slightly loosened drag” mentioned above. If your drag is too tight when the unpredictable second run hits, you will literally be dragged into the ocean. From here, unleash the stamina you’ve conserved and utilize the maximum specs of your rod, reel, and line to endure. Monster class fish can easily peel off another 100m even when near the surface. Never think “it’s over because I see it.” Stay laser-focused.
Step 5 “Landing”: Transition to Straight Fight
Once the fish is fully surfaced and laying on its side, switch to an under-arm “straight fight” without the gimbal. For the final approach near the boat, point your rod in the direction the fish is swimming to guide it (tilting the rod left when it’s swimming right won’t bring it closer). Coordinate with the captain or leader-man to sink the gaff or harpoon, and the fight is won. (Catch & Release involves a different procedure).
6. When and Where to Catch Them? Areas, Seasons, and Charter Costs
[Answer]
Main seasons vary by area: Shakotan (Hokkaido) and Tappi (Aomori) peak from August to October. Charter boat rates range from 80,000 to 160,000 JPY per boat, or about 20,000 to 25,000 JPY for shared trips. Including travel and tackle consumables, expect a budget of over 100,000 JPY a month.
Bluefin casting is done all across Japan, but here are the prime areas:
- Hokkaido – Shakotan Area (Mainly Aug–Oct): Tuna sizes are increasing recently, with 70kg+ fish confirmed. Departure ports include Furubira, Yoichi, and Yobetsu. Charter rates range from 80,000 to 160,000 JPY (3–4 anglers, 6–12 hours). For example, “Kaiyumaru” out of Furubira charges 80,000 JPY for a 4-person charter. Shared boat trips are usually 20,000–25,000 JPY/person.
- Aomori – Tappi / Tsugaru Strait Area (Peak Aug–Oct): Known as the Mecca of bluefin casting, with records of monsters exceeding 200kg. Charters are generally 80,000 to 120,000 JPY (8 hours, up to 4 anglers). Popular boats are fully booked 6 months in advance, requiring early reservations.
- Ibaraki to Chiba Coast (Feb–Apr, Oct–Dec): An area gaining strong results in recent years. Charters are priced around 80,000 JPY per boat (10 hours).
The most important factor in choosing an area is whether the tuna migrating there match the capacity of your tackle. In Tappi and Shakotan, the ratio of monster-class fish is high, making PE #12 tackle mandatory in many situations. Financially, you must factor in boat fees, travel, lodging, and tackle consumables (PE replacement, hook resupply). If you fish 2 to 3 times a month during the season, be prepared to spend 100,000 to 200,000 JPY a month just on boat fees.
7. What Changed in April 2026? Registration Procedures and Catch Limits
[Answer]
As of April 2026, the Fisheries Agency has enforced a “Mandatory Registration System” (once a year) for all anglers. You must register via smartphone a day before your trip. Bag limits are strictly 1 fish per person per specific period. A national monthly quota of 4.2 tons applies; once reached, fishing is totally banned for that month.
Starting April 1, 2026, the Japanese Fisheries Agency has made a Mandatory Prior Registration System for recreational bluefin tuna fishing. Registration is valid for one year and must be completed at least one business day before your first trip. Targeting bluefin without registration (including Catch & Release) during a ban period is a violation of the law.
3 Major Changes in the 2026 Regulations
- Mandatory Registration: Applies to all recreational anglers (charters, pleasure boats, shore casting) targeting bluefin tuna. One registration per person is required, inputting the boat name, departure port, and fishing area.
- Stricter Bag Limits: Strictly limited to 1 fish per person per period (Periods are categorized in 2-month blocks: Apr-May, Jun-Jul, Aug-Sep, Oct-Nov, Dec-Jan, Feb-Mar).
- Monthly Catch Quotas: The national recreational catch quota for large fish is set at 4.2 tons per month. If this limit is at risk of being exceeded, a “Catch Ban Period” is enforced for that month. Since the quota was reached early in many months during 2025, planning trips early in the month is advantageous.
10-Minute Smartphone Registration Guide
Access the Fisheries Agency’s “Registration Portal,” choose LINE login or Guest login. Select “Register for Recreational Bluefin Tuna Fishing,” and input your name, address, phone number, email, planned boat name, port, and sea area. It takes about 10 minutes on a smartphone, and a Registration Number will be issued. Save a screenshot or PDF of this number.
▶ Fisheries Agency: Bluefin Tuna Recreational Registration Portal
⚠️ Warning During Catch Ban Periods
During a ban period, “Catch & Release fishing targeting bluefin” is also strictly prohibited. If you accidentally hook a bluefin while targeting other species, you have a legal obligation to release it immediately. Additionally, reporting your caught tuna (size, weight, area) remains mandatory. Fish over 115cm (fork length) are classified as Large, and under 115cm as Small. Catching Small fish is prohibited year-round.
Conclusion | Prep Starts a Year Ahead: First Step Checklist
Bluefin casting requires 6 to 12 months for tackle prep, a week for line conditioning, 10 minutes for registration, and minutes to hours for the actual fight. It is a game built entirely upon long “preparation.”
Here is a checklist for those starting out:
- 1 Year to 6 Months Before Season: Secure a reel (26 Stella SW 18000HG/25000PG, etc.), a dedicated rod (PE #8-12), and PE line (300m+). Popular models sell out instantly; pre-ordering at tackle shops is the safest bet.
- 3 Months Before: Secure lures (2-3 poppers, 2-3 diving pencils, 1-2 sinking pencils), hardware (ball-bearing swivels, split rings), gimbal belt, and casting gloves.
- 1 Month Before: Practice knot tying (until you can tie a solid PR knot). Spool your reel under high tension and apply line coating. Book your charter boat. Complete Fisheries Agency Registration.
- Right Before the Trip: Check your drag values with a drag checker. Practice casting simulating unstable boat footing. Check the Fisheries Agency website to ensure no sudden catch bans have been enacted.
Bluefin tuna fishing means “preparing for a year and betting everything on a split-second encounter.” I hope this article serves as the first step in your long preparation.
(Related Articles)